


Tel: 0086-576-88113919
Fax:0086-576-88129398
Fax:0086-576-88129398
Views: 0 Author: Site Editor Publish Time: 2025-10-17 Origin: Site

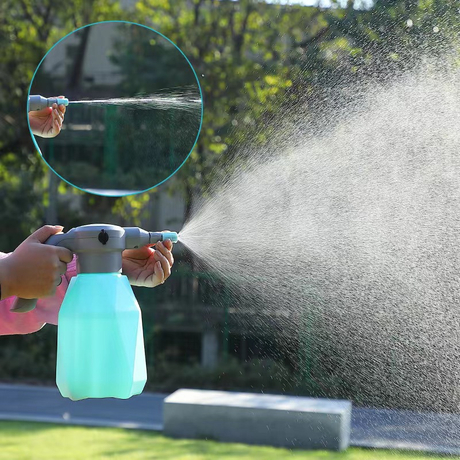
Sprayer calibration is a vital process in agricultural, pest control, and gardening applications. Proper calibration ensures that the correct amount of chemical, water, or fertilizer is applied to the target area. This helps prevent both over-application and under-application of chemicals, which could otherwise result in ineffective treatments, wasted resources, and even environmental damage. Calibration is crucial for optimizing the efficiency and accuracy of spraying operations, especially in fields where precision is paramount, like agriculture.
The first step in this process—measuring nozzle spacing—is essential for setting up a successful calibration. This step directly influences the sprayer’s performance and overall spraying efficiency. Correct nozzle spacing ensures that the liquid is applied evenly, optimizing chemical usage and ensuring uniform treatment.
In this article, we will focus on the first step of calibrating a sprayer—measuring nozzle spacing. We will explore its importance, how to measure it accurately, and the impact it has on the overall calibration process. By the end of this article, you’ll have a thorough understanding of why this first step is vital for effective sprayer calibration.
Nozzle spacing is the distance between the centers of adjacent nozzles on the sprayer boom. This measurement is crucial because it directly affects how the liquid is distributed across the target area. Proper nozzle spacing ensures uniform coverage and consistent application of the liquid, while incorrect spacing can lead to uneven distribution.
The first step—measuring nozzle spacing—is a critical part of sprayer calibration, as it determines how well the sprayer will perform during application. Nozzle spacing impacts the spray pattern, application rate, and efficiency of the sprayer.
The nozzle spacing influences the overlap of spray patterns from adjacent nozzles. If the spacing is incorrect, you risk under-application or over-application of chemicals, both of which can have detrimental effects:
Too Wide Spacing: When nozzles are spaced too far apart, the spray patterns will not overlap sufficiently, leaving gaps between treated areas. This leads to under-application, where certain parts of the area do not receive the necessary treatment.
Too Narrow Spacing: Conversely, if the nozzles are spaced too closely together, the spray patterns will overlap too much, leading to over-application. This wastes chemicals and could result in damage to plants or crops.
Correct nozzle spacing ensures the spray patterns from adjacent nozzles overlap just enough to cover the entire target area evenly and efficiently, without wasting chemicals or leaving untreated areas.

Before measuring nozzle spacing, the sprayer must be inspected to ensure it is in good working condition. Any malfunctions or obstructions in the sprayer could affect the calibration process.
Clogged nozzles can disrupt the spray pattern and affect the uniformity of the calibration. Inspect each nozzle to ensure it is free of dirt, debris, or chemical buildup. If any nozzles are clogged, clean them thoroughly before proceeding.
Ensure that all nozzles are securely attached to the sprayer boom. Loose nozzles can cause inconsistencies in spray patterns, resulting in uneven coverage during spraying.
Leaks or faulty hoses can affect the pressure and flow rate of the sprayer, leading to inaccurate spraying. Check all hoses, connections, and fittings to ensure they are properly sealed and free of any leaks.
Fill the sprayer with clean water before beginning calibration. Using clean water ensures that the calibration process is not influenced by any residual chemicals from previous applications, providing a more accurate calibration result.
Now that the sprayer is in good condition, the next step is to measure the nozzle spacing. This is a straightforward process but must be done carefully to ensure accuracy.
· Measuring Tape: A flexible measuring tape that allows for precise measurements between nozzles.
· Markers: A tool to mark the measuring points on the sprayer boom.
· Note-taking Materials: A notepad or digital device to record the measurements for future reference.
Choose the Starting Nozzle: Select the first nozzle on the sprayer boom as the reference point for your measurements. This nozzle will serve as your starting point for measuring the spacing between adjacent nozzles.
Measure the Distance from Center to Center: Use the measuring tape to measure the distance from the center of one nozzle to the center of the next nozzle. It is essential to measure from the center of each nozzle because the spray pattern depends on the center-to-center distance, not the edges of the nozzles.
Record the Measurement: After measuring the distance, record it in inches (or millimeters) for reference. Accurate measurement at this stage is critical for ensuring that the sprayer’s coverage is uniform.
Repeat the Measurement: Measure the spacing between multiple nozzles along the sprayer boom. It is important to check the spacing at several points to ensure that it is consistent. If there is any variation in spacing, it could affect the spray pattern and the efficiency of the sprayer.
Double-Check the Measurement: Once you have recorded the nozzle spacing, double-check your measurements to ensure their accuracy. Small errors in measurement can lead to large discrepancies in the test course and spraying results.
Once the nozzle spacing has been measured, the next step is to calculate the test course length. The test course is the distance that the sprayer will travel during calibration to ensure that it applies the correct amount of liquid. This calculation is essential for the entire calibration process.
The test course length ensures that the sprayer moves the correct distance during calibration. If the test course length is too short or too long, the amount of liquid applied during the calibration will be inaccurate, leading to poor calibration and inefficient spraying. Accurate nozzle spacing directly impacts the test course length, and therefore, it is vital to get the nozzle spacing right from the start.
Once the test course length has been calculated, the next step is to physically mark the test course on the field. This step ensures that the sprayer will travel the correct distance during calibration.
Use Flags or Stakes: Place flags or stakes at both the starting and ending points of the test course. The distance between the markers should match the test course length calculated earlier. These markers will help you visually track the distance during the calibration process.
Ensure Visibility: Make sure that the flags or stakes are visible from a distance so the sprayer operator can easily follow them during the calibration process.
Double-Check the Marking: Recheck the distance between the markers to ensure they are accurately placed. Any discrepancies in the marked distance will affect the accuracy of the calibration.
While measuring nozzle spacing might seem like a simple task, several mistakes can lead to inaccurate calibration and inefficient spraying. Avoiding these mistakes is crucial for achieving optimal sprayer performance.
It’s critical to measure from the center of one nozzle to the center of the next nozzle. Measuring from the edges or other incorrect points will distort the nozzle spacing and lead to inaccurate calibration.
Always measure the distance between several nozzles along the sprayer boom. If you only measure one or two nozzles, you may miss inconsistencies in spacing that could affect the overall spray pattern.
The accuracy of your measuring tape is vital. If the tape is stretched or not calibrated properly, the measurements will be inaccurate. Use a high-quality measuring tape to ensure precise measurements.
The first step in calibrating a sprayer—accurately measuring nozzle spacing—is critical for effective spraying. By ensuring that the nozzle spacing is correct, you can achieve consistent and uniform coverage, maximize efficiency, and minimize wasted chemicals. This step is the foundation for the entire calibration process and influences all subsequent measurements and adjustments.
For those seeking reliable sprayers for calibration and efficient application, Taizhou Guangfeng Plastic Co., Ltd offers a wide range of durable sprayers designed for easy calibration and precise chemical application. Their products ensure efficiency, ease of use, and durability, enabling you to achieve optimal results right from the first step of calibration.
By following the correct procedures for sprayer calibration, starting with accurate nozzle spacing measurement, you can ensure that your sprayer delivers consistent, accurate results every time, maximizing the effectiveness of your spraying operations.
The first step in calibrating a sprayer is to measure the nozzle spacing. This step is essential as it directly affects the spray pattern and application rate, influencing the entire calibration process.
Nozzle spacing is crucial because it affects how evenly the liquid is distributed across the target area. Proper nozzle spacing ensures uniform coverage, while incorrect spacing can lead to over-application or under-application of chemicals.
To measure nozzle spacing accurately, use a measuring tape to measure the distance between the centers of adjacent nozzles. Ensure precision, and double-check your measurements to avoid errors.
Incorrect nozzle spacing leads to either overlap or gaps in the spray pattern. Overlap results in excessive chemical application, while gaps lead to untreated areas, reducing the effectiveness of the treatment.
Sprayers should be calibrated at the beginning of each spraying season, after any changes to the sprayer (e.g., nozzle replacement), and whenever there are noticeable performance issues, such as uneven spraying.
If the nozzles are not uniformly spaced, adjust them to ensure equal spacing across the boom. Inconsistent spacing will cause uneven coverage, affecting the spray pattern and the effectiveness of the application.
Nozzle spacing is typically measured in inches or millimeters. Be sure to use consistent units throughout the calibration process to avoid discrepancies.
If you don’t have a standard measuring tape, you can use any accurate measuring device, such as a ruler, laser distance measure, or even a wheel measure for larger sprayers.
Nozzle spacing directly impacts the uniformity of the spray application. Wider spacing leads to gaps and narrow spacing leads to excessive overlap. Both can waste chemicals or fail to provide proper treatment.
If the sprayer is not applying liquid evenly, first check the nozzle spacing. If the spacing is correct, inspect the nozzles for blockages, and ensure the sprayer pressure and flow rate are within the recommended settings.
Taizhou Guangfeng Plastic Co.,Ltd is specialized in manufacturing agriculture knapsack sprayers and garden sprayers for more than 28 years.Products exported to over 50 countries and our brand Farmguard shares great fame in the world. If you want to know more, welcome to contact us.